目录
-
CSS 教程
- CSS 主页
- CSS 简介
- CSS 语法
- CSS 选择器
- CSS 如何使用
- CSS 注释
- CSS 颜色
- CSS 背景
- CSS 边框
- CSS 外边距
- CSS 内边距
- CSS 高度/宽度
- CSS 盒子模型
- CSS 外轮廓
- CSS 文本
- CSS 字体
- CSS 图标
- CSS 链接
- CSS 列表
- CSS 表格
- CSS 显示
- CSS 最大宽度
- CSS 位置
- CSS Z-index
- CSS 溢出
- CSS 浮动
- CSS 行内块
- CSS 对齐
- CSS 组合器
- CSS 伪类
- CSS 伪元素
- CSS 不透明度
- CSS 导航栏
- CSS 下拉菜单
- CSS 图片画廊
- CSS 图片精灵
- CSS 属性选择器
- CSS 表单
- CSS 计数器
- CSS 网站布局
- CSS 单位
- CSS 特异性
- CSS !important
- CSS 数学函数
- CSS 高级
- CSS 响应式
- CSS 网格
- CSS SASS
- CSS 示例
- CSS 参考
CSS 样式图片
了解如何使用 CSS 设置图片样式。
圆形图片
使用border-radius属性来创建圆形图片:
缩略图
使用border属性来创建缩略图。
缩略图:

示例
img {
border: 1px solid #ddd;
border-radius: 4px;
padding: 5px;
width: 150px;
}
<img src="paris.jpg" alt="Paris">
亲自试一试 »
缩略图作为链接:
示例
img {
border: 1px solid #ddd;
border-radius: 4px;
padding: 5px;
width: 150px;
}
img:hover {
box-shadow: 0 0 2px 1px rgba(0, 140, 186, 0.5);
}
<a href="paris.jpg">
<img src="paris.jpg" alt="Paris">
</a>
亲自试一试 »
响应式图片
响应式图片将自动调整以适合屏幕尺寸。
调整浏览器窗口大小查看效果:
如果您希望图片在必要时缩小,但绝不放大到大于其原始尺寸,请添加以下内容:
提示:在我们的网站中阅读有关响应式网页样式的更多信息CSS RWD 教程。
图片居中
要将图片居中,请将左右边距设置为auto并把它做成一个block元素:
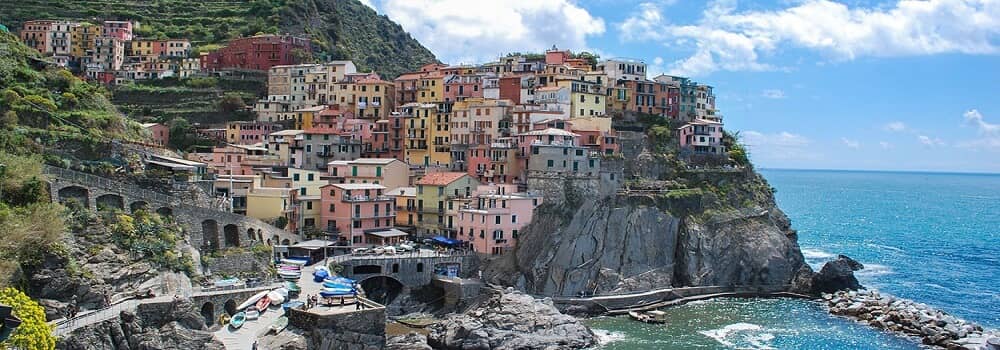
宝丽来照片/卡片

五渔村

北极光
示例
div.polaroid {
width: 80%;
background-color: white;
box-shadow: 0 4px 8px 0 rgba(0, 0, 0, 0.2), 0 6px 20px 0 rgba(0, 0, 0, 0.19);
}
img {width: 100%}
div.container {
text-align: center;
padding: 10px 20px;
}
亲自试一试 »
透明图片
这个opacity属性可以取 0.0 - 1.0 之间的值。值越低,越透明:
不透明度0.2
不透明度0.5
不透明度 1
(默认)
图片文字
如何在图片中定位文本:
图片滤镜
CSSfilter属性为元素添加视觉效果(如模糊和饱和度)。
笔记:Internet Explorer 或 Edge 12 不支持过滤器属性。
提示:去我们的CSS 过滤器参考了解有关 CSS 过滤器的更多信息。
图片悬停叠加
创建悬停时的叠加效果:
翻转图片
将鼠标移到图片上:
响应式图片库
CSS 可用于创建图片库。此示例使用媒体查询在不同的屏幕尺寸上重新排列图片。调整浏览器窗口大小查看效果:
在此添加图片的描述
在此添加图片的描述

在此添加图片的描述

在此添加图片的描述
示例
.responsive {
padding: 0 6px;
float: left;
width: 24.99999%;
}
@media only screen and (max-width: 700px){
.responsive {
width: 49.99999%;
margin: 6px 0;
}
}
@media only screen and (max-width: 500px){
.responsive {
width: 100%;
}
}
亲自试一试 »
提示:在我们的网站中阅读有关响应式网页样式的更多信息CSS RWD 教程。
图片模态(高级)
这是一个演示 CSS 和 JavaScript 如何协同工作的示例。
首先,使用CSS创建一个模态窗口(对话框),并默认隐藏它。
然后,当用户单击图片时,使用 JavaScript 显示模式窗口并在模式内显示图片:
示例
// Get the modal
var modal = document.getElementById('myModal');
// Get the image and insert it inside the modal - use its "alt" text as a caption
var img = document.getElementById('myImg');
var modalImg = document.getElementById("img01");
var captionText = document.getElementById("caption");
img.onclick = function(){
modal.style.display = "block";
modalImg.src = this.src;
captionText.innerHTML = this.alt;
}
// Get the <span> element that closes the modal
var span = document.getElementsByClassName("close")[0];
// When the user clicks on <span> (x), close the modal
span.onclick = function() {
modal.style.display = "none";
}
亲自试一试 »
×
![]()
截取页面反馈部分,让我们更快修复内容!也可以直接跳过填写反馈内容!